You’ve seen the smooth, glowing gradients in manga fan art and wondered: what are alcohol markers, and how do they actually work? This guide covers the mechanics — solvent ink, dual-tip design, paper requirements — plus a clear breakdown of the brand landscape from Copic down to entry-level. By the end, you’ll know whether alcohol markers fit your goals and what to look for when buying your first set.
This is the reference guide — the ‘what’ before the ‘how.’ For the step-by-step hands-on version, our tutorial on how to use alcohol markers covers your first session in detail.
What are alcohol markers and how do they work
The name is slightly misleading. ‘Alcohol’ refers to the solvent that carries the dye — isopropyl alcohol or ethanol — not the smell or the ink color. Here’s the basic chemistry: dye-based pigment is dissolved in alcohol solvent, loaded into a felt-tip nib, and deposited onto paper as you draw.
The key property is reactivation. When you lay down a second stroke before the first has fully dried, the fresh solvent dissolves the previous ink layer, blending the two colors together. That’s what produces the seamless gradients you see in high-quality alcohol marker work — not skill alone, but the chemistry working in your favor. This is fundamentally different from water-based markers, where overlapping strokes don’t reactivate and blend — they streak.
This also means paper matters more than with any other marker type. Regular copy paper is porous enough that the solvent soaks through immediately. Dedicated marker paper has a denser, harder surface that slows absorption, keeps colors vivid, and stops bleed-through to the sheet below. Most beginners discover this the hard way on their first session.
How the ink formula works
Alcohol marker ink is almost always dye-based — meaning the colorant is dissolved in the solvent rather than suspended as particles (which is what pigment-based ink does). Dye-based ink produces rich, transparent color and blends smoothly because both layers are chemically identical solvents that mix at the molecular level. The trade-off is lightfastness: dye molecules break down under UV exposure faster than pigment particles do. This is why alcohol marker artwork should be displayed away from direct sunlight or framed under UV-protective glass for long-term preservation.
The solvent itself evaporates within seconds of hitting paper — which is why you have a limited blending window. Work quickly, and the layers blend. Work slowly, and you get a hard edge where the first layer dried before the second arrived. Professional illustrators use this evaporation timing deliberately: working wet-on-wet for blended areas, letting areas dry completely before adding sharp detail on top.
Because alcohol markers are transparent by nature, color mixing works differently than with paint. Layering a yellow over a blue produces a green — not by mixing the two dyes together in a cup, but by the light passing through two transparent layers and reading as a combined color. This is why artists talk about ‘tonal families’ rather than color mixing: you need a range of pre-mixed tones from light to dark within each hue, rather than creating gradients by blending entirely different colors.
Dual-tip anatomy
Most professional alcohol markers are dual-tipped: one nib at each end of the barrel. The standard pairing on a chisel + bullet marker (like Finecolour Sketch) gives you a broad flat edge for fills and a narrow round tip for detail. Brush nib markers (like Finecolour Brush, Copic Brush) replace the bullet with a flexible fiber brush — thicker or thinner strokes depending on pressure.
Tip quality affects ink delivery significantly. Finecolour’s Sketch and Brush lines use Japanese tips, which are denser and wear slower than cheaper felt alternatives. Entry-level markers often use softer felt that frays after a few months of regular use. The barrel is refillable on Finecolour markers, which extends the life beyond what the nib alone determines.
What alcohol markers are used for
The solvent-ink mechanism makes alcohol markers the tool of choice for any artwork that requires smooth color transitions. Here’s where they actually get used:
- Anime and manga illustration — cel shading, skin tone blending, hair gradients. The medium’s most popular application globally, and the reason most hobbyists discover it. The controlled flat-then-gradient fill style maps perfectly to how alcohol markers behave.
- Character design and concept art — fast color blocking and value studies for game and animation development. Markers are faster than digital for quick explorations.
- Architecture and product rendering — grey-tone washes, material texture (wood, metal, glass), shadow fills on elevations and perspectives. Often paired with pigment fineliners for precise line work over the color wash.
- Fashion illustration — fabric shading and skin tones at speed, important for portfolio work and client presentations.
- Card-making and adult coloring — the card-making market drove early Western adoption of brands like Spectrum Noir and Promarker. Stamped designs and pre-printed coloring sheets are ideal for learning the medium.
- Lettering and brush calligraphy — brush-nib alcohol markers offer line variation that makes them effective for modern calligraphy and hand-lettering projects.
What alcohol markers are used for ultimately comes down to one thing: layered, blended color on paper. If your project needs opaque coverage (like murals or canvas), acrylic markers are the better tool. If you need watercolor-style washes with water, use watercolors. Alcohol markers occupy the middle ground — faster than watercolor, more controllable than acrylic, and capable of smoother gradients than either.
If you’re not sure which art direction is right for you, our guide to the best alcohol markers for beginners walks through the top beginner-friendly sets by use case — manga, architecture, card-making — so you can pick a starter set matched to your goals.
The fact that these markers use the same ink chemistry across brands also means that different brands are technically mixable: Finecolour markers blend with Copic markers because both solvents reactivate each other. Just don’t expect color numbers to correspond — a Finecolour R20 is not the same hue as a Copic R20.
Alcohol markers vs other marker types
Here’s where each marker type wins — and where it doesn’t:
- Alcohol markers vs water-based markers: Alcohol blends by reactivation; water-based doesn’t — overlapping strokes streak rather than blend. Alcohol dries faster and doesn’t warp light paper the way water does. Water-based cleans up with water and needs no ventilation. For children’s classroom use, water-based is the safer, more practical choice.
- Alcohol markers vs acrylic markers: Acrylic markers are opaque, cover dark surfaces, and work on wood, fabric, and glass. Alcohol markers are translucent, build up in layers, and are limited to paper and some non-porous surfaces. Different use cases entirely — if you need to mark over a dark substrate, alcohol markers won’t show.
- Alcohol markers vs oil-based markers: Oil-based markers (like Posca Oil) are paint markers, primarily for outdoor signage and non-paper surfaces. Not a comparison most hobbyist illustrators need to make.
For illustration on paper — which is the core use case — alcohol ink markers are the industry standard because blending is faster and more predictable than any alternative. The speed advantage is significant: a skilled illustrator can lay down fully blended color in the time it would take to mix watercolor pigment.
One nuance that matters at the intermediate level: alcohol markers are fugitive media for archival purposes. The dye-based ink is not lightfast in the way that oil paint or watercolor pigment is rated. For pieces intended for display under gallery lighting or outdoor exposure, expect some color shift over years. This is a known property of the medium — not a defect of budget brands specifically. Even Copic markers are dye-based. If lightfastness matters for a specific project, consider adding colored pencil on top (pigment-based and significantly more lightfast) as a finishing layer.
How to choose your first alcohol markers
Four decisions, in order:
1. Set your budget band
Entry-level (under for a starter set): Caliart, Ohuhu, Finecolour Junior. These teach the medium without major financial commitment. Mid-range (–70): Finecolour Sketch, Touchnew, Stylefile. Here the ink quality and nib durability make a noticeable difference. Premium (+/set, –8/marker): Copic Ciao, Copic Sketch. The functional gap between entry and mid is smaller than the price gap suggests. The gap between mid and Copic is real — mostly in blend smoothness and lightfastness — but matters less until you’re producing finished work you want to last years.
2. Pick your tip type
Chisel + bullet (Finecolour Junior, Copic Ciao): best for fills, geometric shapes, graphic design, and architecture renders. Chisel + brush (Finecolour Sketch, Finecolour Brush, Copic Sketch): best for organic shapes, portraits, free-form illustration, and calligraphy. If you’re not sure, start with chisel + bullet — it’s easier to control. You can always move to brush nib once you’ve learned ink behavior.
3. Start with 24–36 colors
More colors in your first set doesn’t mean better results. A 24-color set forces you to learn color mixing and tonal stepping. A 72-color set looks impressive but most of those colors will sit unused for months, and the sheer number can trigger decision paralysis mid-drawing. Build your collection based on gaps you discover in actual drawings, not by buying the biggest set upfront.
A strong beginner palette prioritizes: 2–3 skin tones, 3 cool greys, 1 warm grey, 1 black, and 5–6 accent colors across different hue families. That’s 13–14 markers that cover the majority of beginner subjects.
As you practice, you’ll discover which colors you reach for constantly and which sit untouched for months. The colors you use most — usually the ones matching your favorite subjects — are the ones worth buying as open-stock singles or in refill form. Building a collection around your actual drawing habits rather than a brand’s recommended set list is the approach that experienced marker artists consistently recommend.
4. Check for refillability and open stock
A refillable marker costs more initially but becomes dramatically cheaper per use over time. Finecolour markers are refillable — a 9-color refill kit covers the most-used tones. Copic’s entire system is refillable with individual color purchases available as singles. Brands like Caliart and Ohuhu are not refillable, which is fine for beginners testing the medium but expensive if you draw regularly.
Once you have your first set, the most important next skill to develop is blending. How to blend alcohol markers explains the wet-on-wet technique, colorless blender use, and color-family stepping — the three mechanics that separate flat fills from smooth gradients.
Open stock — buying individual markers rather than pre-made sets — is equally important. It means you can replace colors you exhaust without buying duplicates. Finecolour’s full 240-color range is available as individual Sketch markers, which is one of the strongest arguments for the brand over Ohuhu or Touchnew for illustrators planning to grow their collection.
Are alcohol markers permanent? On paper, yes — the dye bonds to the paper fiber and doesn’t smear once dry. But dye-based ink fades under UV light over time. This is different from lightfastness — for finished artwork displayed in daylight, you’ll want to frame it under UV-protective glass, or accept some gradual color shift. Professional artists who need archival-quality prints use colored pencils or pigment-based media on top.
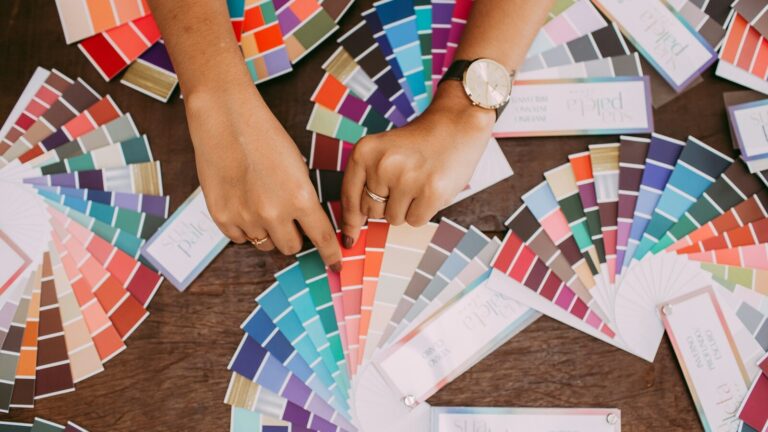
To see what 240 colors look like across the full range, explore the Finecolour color range — it’s the most useful reference when planning your first palette.
FAQ
The four questions every first-time buyer asks.
What are alcohol markers, exactly?
Alcohol markers are artist markers that use dye-based ink dissolved in an alcohol solvent — isopropyl alcohol or ethanol. The solvent dries fast, reactivates previous ink layers when you overlap strokes, and produces the smooth gradients the medium is known for. They’re distinct from water-based and acrylic markers in blending behavior and surface requirements.
Are alcohol markers better than water-based markers?
Better is the wrong word — they’re different tools. Alcohol markers blend more smoothly and dry faster, which suits illustrators working in layers. Water-based markers are easier to clean up, require no ventilation, and work on more surfaces. For manga, anime, and illustration on paper, alcohol-based is the industry standard. For casual craft work or classroom use, water-based is often the smarter choice.
Do alcohol markers work on regular printer paper?
They’ll technically work, but you’ll fight bleed-through on every stroke. Regular copy paper is too porous — solvent soaks straight through. Marker paper or smooth bristol (90–150 gsm) with a closed surface gives you clean layering without bleed. A cheap alternative: HP Premium inkjet paper handles alcohol markers reasonably well for practice work.
What’s the difference between alcohol markers and alcohol ink?
Alcohol markers deliver dye ink via a felt-tip nib. Alcohol ink (sold in dropper bottles by brands like Ranger Adirondack) is the same solvent-dye chemistry used loose — dropped onto non-porous surfaces like Yupo paper or resin for fluid art. Same chemistry, entirely different application. If someone says ‘alcohol ink art,’ they mean the fluid dropper technique, not markers.
Final Thoughts
Alcohol markers are the medium of choice for blended illustration work on paper — nothing else matches the combination of speed, layerability, and smooth gradients at the price. The learning curve is steeper than colored pencils but shallower than watercolor, and the results show quickly.
If you want to understand what are alcohol markers before committing to a purchase, the clearest test is paper: buy a 12-color entry set, try it on marker paper and copy paper back to back, and watch how the solvent behaves. Most people who do this are hooked within an hour.
Ready to see the full color range? Browse the Finecolour color palette — 240 colors across the Sketch, Brush, and Junior lines, with swatch references for every tone.