Your markers just arrived. You’ve unwrapped them, checked the colors, and now you’re staring at a blank page wondering where to start. Knowing how to use alcohol markers means understanding a handful of things upfront — paper, color order, and timing — that aren’t obvious from the packaging. This step-by-step tutorial gets you from unboxing to a finished colored drawing without the first-session mistakes that discourage most beginners.
How to use alcohol markers (the basics)
Alcohol markers work differently from regular felt-tips in one critical way: the solvent in the ink reactivates previous layers when you overlap strokes. That’s what makes blending possible — and it’s also why color order matters.
Most alcohol markers are dual-tipped: a broad chisel nib on one end for fills, a narrow bullet or flexible brush nib on the other for detail. The chisel is your workhorse — large flat fills, soft edges on organic shapes, any area bigger than a thumbnail. The bullet or brush nib handles tight detail, linework over fills, and any stroke that needs to vary in width.
Cap whichever end you’re not using. Leave caps off for more than a few minutes and the nib starts to dry out. Even mid-session, if you stop to think for 30 seconds, cap the marker.
For a deeper dive into the chemistry behind reactivation, check out our guide on what are alcohol markers — this tutorial is purely practical.
Setting up: paper, surface, ventilation
Setup is where most tutorials skip straight to drawing. Don’t. Three things matter before you uncap your first marker.
Paper
Regular printer paper and most sketchbook paper are too porous. The solvent soaks through immediately, bleeds to the surface below, and produces washed-out color. You need marker paper: a denser, harder-surfaced paper that slows solvent absorption and keeps colors vivid on both sides.
If you don’t have marker paper yet, HP Premium inkjet paper is a workable substitute for practice. Bristol smooth (90 gsm+) is another option. Avoid watercolor paper and textured sketch paper — the surface grain will fight your fills and cause uneven color. For a full breakdown of why paper matters and which types work best, see our guide to best paper for alcohol markers.
Work surface
Put a backing sheet under your drawing before you start. Even on marker paper, heavy ink applications can transfer to whatever is below — your desk, your next sheet, or the table surface. A cutting mat works. A folded piece of scrap card works. Just don’t skip it — the first time a drawing bleeds through to an irreplaceable surface, you’ll wish you had a mat.
Ventilation
Open a window. Alcohol marker fumes are mild — you won’t feel sick from a normal session — but in an enclosed room with 20+ markers open, the cumulative isopropyl smell gets noticeable. It’s a basic health habit, not a warning label, but it’s real. If you’re drawing for extended sessions, keep airflow moving.
If you’re working with Finecolour Junior or Sketch markers, the alcohol scent is noticeable but not harsh. The Fineliner line is pigment-based and essentially odorless — no solvent at all. For anyone sensitive to smells, consider the Fineliner as a companion for detail work while ventilating for the main markers.
Your first strokes: light to dark
This is the section that will actually change how you color with alcohol markers. The rule is simple and non-negotiable: always go light to dark. Dark ink will always overpower light ink when the two overlap. You can deepen a color, but you cannot lighten it. This isn’t a stylistic preference — it’s chemistry.
Step 1: Build a test swatch
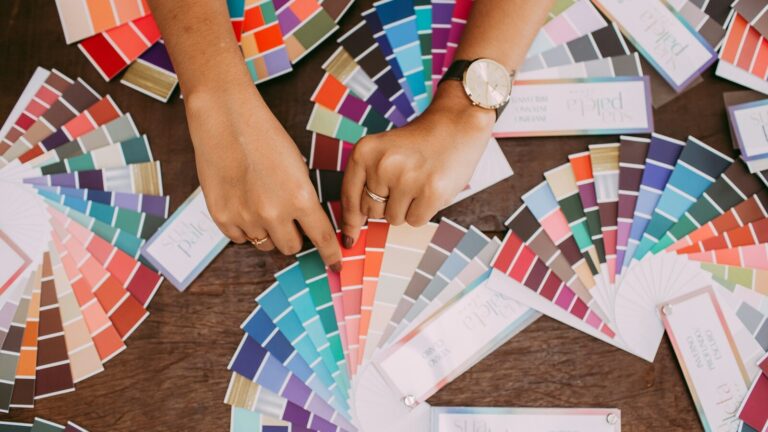
Before you touch your drawing, swatch the colors you plan to use on a scrap of the same paper. Lay them in order from lightest to darkest. This does two things: confirms the actual color (colors look darker in the barrel than they appear on paper) and shows you how they layer together. A test swatch strip takes 90 seconds and prevents frustrating color surprises mid-drawing.
Step 2: Fill with your lightest color first
Start with the lightest value in your fill area. Use quick, even strokes parallel to the edge you’re filling. Don’t slow down — the ink needs to stay wet for the next layer to blend into it. You have roughly 10–30 seconds before the solvent evaporates enough to close the blending window. Larger areas need faster strokes.
Step 3: Add darker colors into the wet edge
While the first layer is still tacky, stroke your mid-tone color into the edge of the light area. The solvent in the fresh marker reactivates the previous layer and pulls the colors together. This is the wet-on-wet technique. On good marker paper, you can get very smooth gradients this way. On less forgiving paper, you’ll see the blend but with some texture — which is fine for learning.
The size of your fill area determines how fast you need to work. A small thumbnail fill? You can go fairly slowly. A large sky background? You need to move fast enough that no section fully dries before you reach the blend edge. For large fills, work in sections and use the colorless blender to reconnect areas that have started to set.
Step 4: Feather and blend
After your mid-tone is placed, go back over the transition with the light marker again to feather the boundary. A colorless blender marker — a marker with solvent but no dye — can be used here too. It extends the wet window and softens any hard edges without adding color. Many illustrators use the colorless blender on the last pass of every gradient to smooth any visible stroke marks.
Cap every marker between strokes. This single habit keeps nibs from drying out and extends marker life significantly.
Common beginner mistakes to avoid
These are the four mistakes most first-time users make — and the fix for each.
- Wrong paper: Using regular copy paper or textured sketchbook paper causes instant bleed-through and washed-out color. The ink deposits correctly but soaks through to the next sheet. Fix: marker paper or smooth bristol only for any drawing you want to keep. Use scrap paper only for swatch testing.
- Going dark to light: You cannot lighten a color with alcohol markers. Darker ink always overpowers lighter ink when they overlap. If you accidentally go too dark, you can try lifting slightly with a colorless blender, but the result is inconsistent at best. Fix: always swatch your palette in light-to-dark order before starting, and commit to that sequence.
- Pressing too hard: The nib is felt fiber. Grinding it against rough paper or using heavy pressure frays the tip within weeks. Fix: let the nib glide across the paper surface. You should be using almost no downward pressure — the ink deposits itself via capillary action. Light touch, quick strokes.
- Leaving caps off: A nib left exposed for 20 minutes can dry out enough to affect ink flow — you’ll notice the color looking lighter or the strokes becoming inconsistent. Fix: cap immediately after each stroke. Build the habit from session one.
Looking for your first set to practice with? The Finecolour Junior range is built specifically for this stage — balanced starter sets, chisel and bullet tips, and the right ink behavior for learning technique before investing in the Sketch or Brush lines.
One additional tip that most tutorials skip: try your first markers on a photocopied line drawing before working on original art. Photocopy a simple coloring-book style figure — clean black line, white fill. Color within the lines using light-to-dark technique. The defined boundary gives you clear areas to practice fills and blending without worrying about the drawing itself. Most beginners improve faster this way than on blank paper.
FAQ
The four questions every beginner asks after their first session.
How do you use alcohol markers for the first time?
Start with a marker paper pad, not regular copy paper. Swatch your colors on a test strip before drawing — lightest to darkest. Use quick parallel strokes and cap the marker after each use. For your first piece, draw something simple: a sky gradient, a piece of fruit, or a flat color fill. You’re learning the paper and ink behavior before technique.
Do alcohol markers bleed through paper?
Yes, on most paper. Printer paper, sketchbook paper, and watercolor paper are all porous enough for the solvent to soak through. Dedicated marker paper or smooth bristol stops bleed-through. Always put a backing sheet under your drawing — even on marker paper, heavy applications can transfer to whatever is below.
Can beginners blend alcohol markers?
Yes — blending is easier than it looks once you understand timing. Apply the lighter color, then immediately stroke the darker color into the wet edge. The solvent keeps both layers active for 10–30 seconds. A colorless blender extends that window. Speed matters more than technique — move quickly and the colors blend themselves.
How do you stop alcohol markers from streaking?
Three causes: wrong paper, working too slowly, inconsistent pressure. Use marker paper, work in fast parallel strokes, and keep pressure even. If you still see streaks, add a second layer while the first is slightly tacky — the fresh solvent reactivates the previous layer and fills the gaps.
Final Thoughts
The first session with alcohol markers is often frustrating — usually because of paper, not technique. Fix the paper, understand light-to-dark coloring order, and the medium starts to click fast. Most beginners notice a real improvement by their second hour of practice, not their second month.
If you want to go further after mastering the basics, how to blend alcohol markers covers wet-on-wet and colorless-blender techniques in much more depth. And when you’re choosing your first set, browse the Finecolour color range — the Junior and Sketch lines are both solid starting points depending on your budget and the kind of drawing you want to do.
Marker technique builds quickly once the fundamentals are solid. Most artists find the first three hours of practice more educational than any tutorial — the physical feedback of the nib on paper teaches you things that reading can’t. How to use alcohol markers is really a question you answer by using them.